www.onthewaymodels.com |
In The Box Preview & Comparison |
||||
|
Article by
Stephen Brezinski
- sbrez1(at)comcast(dot)net
Edited by Al Magnus |
|||||
www.onthewaymodels.com |
In The Box Preview & Comparison |
||||
|
Article by
Stephen Brezinski
- sbrez1(at)comcast(dot)net
Edited by Al Magnus |
|||||
|
Manufacturers 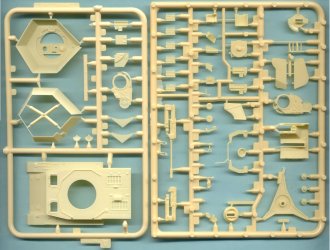
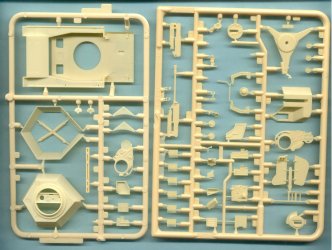
In the two photographs above, the left sprue is the Sprue-A, which is particular to MACO's Ostwind kit containing the 6-sided open-top turret (parts A4 & A5), some Flak 43 parts particular to the Ostwind kit, and the modified Pz IV upper hull (part A1). Why not use the Revell Pz IV hull you ask? Look at the placement of the radio operator hatch and you will see that it has been moved forward to make room for the Ostwind's larger turret ring so the engine hatches could be opened with the larger turret. The molding looks very good and the turret shell appears very thin. The right sprue is Sprue-D for the 3.7cm Flak 43 which is common to the MACO kits 7202, 7206 7211 and others. Molding and detail are very good. Many parts appear very delicate so be careful when cutting them from the sprue. Some parts such as the gun base (part D1) and the shield (parts D33, D34 and D35) are not used with this Ostwind model. Like with the Hasegawa kit we will need to drill out the muzzle of the gun barrel. 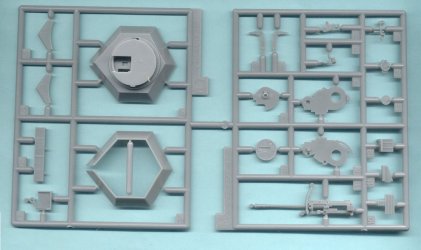
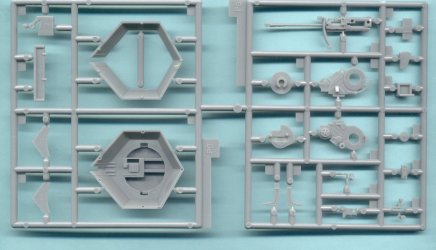
In the two photographs above are Sprue-L (left) and Sprue-M (right) for Hasegawa's Ostwind and turret and Flak 43 gun respectively. The turret (parts L5 and L6 ) is the same basic shape as MACO's though the plastic is thicker. One of the first things I noticed when comparing the Hasegawa and MACO models was the significantly greater number of parts in the MACO kit. Hasegawa's molding quality is very good, though the detail is simplified compared to MACO. This Hasegawa kit includes their stock upper Pz IV hull that was used with the Ostwind prototype, not a hull with the revised radio operator hatch location. 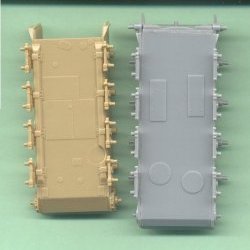
Though not typically seen after the model is built, it is clear that the underside of the Revell Pz IV (at left) is significantly more accurate than the Hasegawa kit. Both lower hulls are made of four parts, in contrast to Trumpeter's and Dragon's Pz IV hulls, which are slide molded in one piece. At this stage the gray Hasegawa hull looks significantly longer than Revell's. 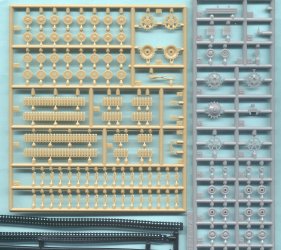
The wheels and tracks for these two kits (Revell/MACO tan sprue, Hasegawa grey sprue-K & black tracks) we have seen before in the Revell and Hasegawa Pz IV model kits. Revell's roadwheels look more correct and assemble well (I prefer to assemble and paint my wheels while still on the sprue). Hasegawa's roadwheels are the type with cast hubs as seen on the Pz IV F and G while Revell's roadwheels have the forged hubs as seen on the Pz IV H and J. Hasegawa gives us a choice of two different styles of sprocket wheel: mid-production (for a Pz IV F or G) or late production (for a Pz IV H or J). Revell's sprocket wheels are the late war type. Both offer the same style of idler wheels. MACO provides Revell Pz IV link & length tracks which I find a little thick but well done. I would prefer for MACO to provide some of their own Pz IV tracks I have heard good things about. The Hasegawa soft band tracks are dismal and are best covered in snow or mud for a display model. (CMK, MACO, OKB GRIGOROV companies and others make aftermarket Pz IV tracks in 1/72 scale.) At the top of Hasegawa's sprue-K we can see 3.7cm ammunition clips (parts-13) for the Ostwind and a spare 2cm cannon barrel box (part 15) for Hasegawa's Wirbelwind model, and an antenna mount (part 14). Assembly Instructions Both MACO and Hasegawa offer parts diagrams within their instructions. 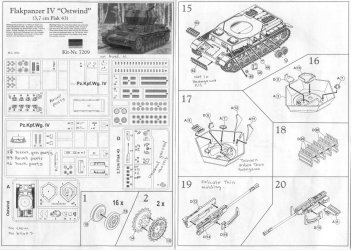
The 30-step MACO instructions appear complete and clear. For this review the pages of MACO's assembly instructions I have included here mostly cover assembly of the Ostwind turret since the Revell Pz IV parts are included in other kit reviews. The spent cartridge tray (part A10) shown in Step-16 has a wire basket in my photo references that we may wish to scratchbuild. On the parts diagram at the left in the above picture, the unused Revell parts are not shown, but most all are still there on the actual sprues giving us a bunch of extra Revell Pz IV H parts to play with. 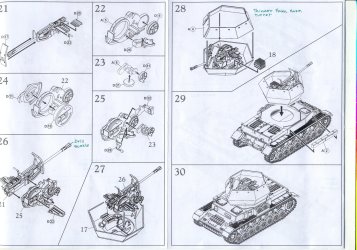
The MACO Flak 43 instructions look pretty clear. Note that with both kits it is advised to assemble all the turret interior parts before attaching the upper turret half. Some fine weld beads along the many welded edges may be a nice touch. While the spare roadwheels here in Step-30 are mounted on the port side like as seen on the Pz IV, a reference photo of a production Ostwind shows the two roadwheels mounted on the corners of the rear plate which is an interesting variation, similar to the Stu.Pz.IV Brummbar Sd.Kfz.166 spare wheel storage. 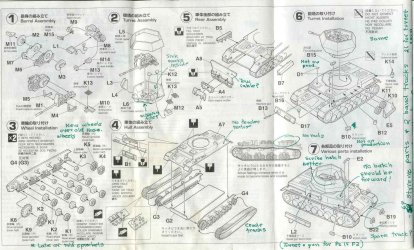
Hasegawa's instructions have fewer steps reflecting the fewer parts and standard format for most 1/72 scale Hasegawa armor kits. Since this kit represents the Ostwind prototype the chassis is a standard Pz IV Ausf. G. For reviews of the Hasegawa Pz IV kits try here and here. I did not include a scan of Hasegawa's parts diagram but my kit included all the parts for a full Pz IV Ausf F2/G (compete turret and gun) model. 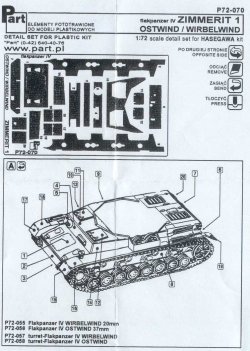
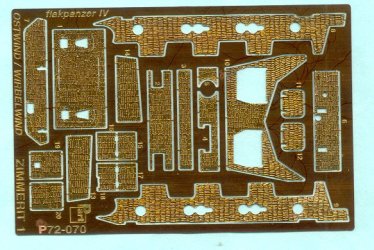
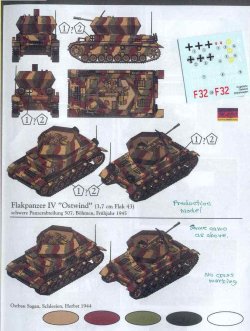
MACO's color painting and marking guide above is typical of MACO small scale models and displays two Ostwinds with both the same 3-color hard-edge camouflage scheme, the only difference is that the bottom vehicle has no balkenkreuz markings. The small decal sheet also includes markings for the MACO Modelwagen and Kugelblitz kits which will go unused for the spares box. 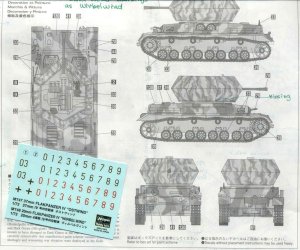
Hasegawa gives us a black & white drawing of their Ostwind which is typical of Hasegawa small scale armor kits. The 3-color camouflage scheme on the turret is a different pattern than on the chassis which likely reflects that it's a rebuilt Pz IV chassis modified to carry the Ostwind turret. The only marking appears to be small unit marking (decal number 2). There is no balkenkreuz or number markings to be used. This decal sheet is shared with the Hasegawa Wirbelwind kit and most of the markings go unused. A nice feature of this decal sheet is that with a little extra decal film coating over the kit title at the bottom, it can be slid off and placed on a display base for the completed model. Conclusions I do know from personal and shared experience that the Revell Pz IV kit builds well and into a fine 1/72 scale model. I have not assembled the MACO model parts yet but in the box it looks like a great model with top notch casting and detail. Some good figures for these two models that will fit into the small turret would be most welcome, a good project for MACO or Milicast for example? The Hasegawa Pz IV kits assemble well and were great improvements over the old ESCI Pz IV models when released in the 1990's, but at this time, by the present standards expected by display modelers, the detail is lacking for a display model. Hasegawa's greatest weakness is their old, poor band tracks. If they would upgrade their Pz IV kit tracks they could bring these kits closer on-par with the Revell Pz IV kits. Both models will build into a realistic small scale Ostwind model. For a robust easy to assemble model of the Ostwind Flakpanzer for wargaming I do recommend the Hasegawa kit as the best choice. The MACO model should produce the most realistic display model. I am surprised that at this time neither Dragon nor Trumpeter have offered the Ostwind and Wirbelwind in 1/72 scale. References [1] Panzer Tracts No. 12, Flak Selfstfahrlafetten and Flakpanzer, Thomas Jentz and Hillary Doyle, Darlington Productions (1998). [2] Flakpanzer, Wydawnictwo Militaria No. 18, J. Ledwoch and H. Trojca (1995). ISBN 83-86209-26-7 [3] German Medium Flak In Combat, Werner Muller, Schiffer Military History (1991). ISBN 0-88740-351-4 [4] Achtung Panzer [5] Nuts & Bolts Vol. 13 Flakpanzer IV Wirbelwind ∓ Ostwind, Detlev Terlisten et al. (This volume appears to have been replaced with an updated Nuts & Bolts Volume 25) |
| Back to Articles page Back to MACO list Back to Hasegawa list |
Back to Home Page |
Article Last Updated: 22 February 2014 |
|