|
Mach 2
|
Vietnam Patrol Boat PBR 31 Mk. II “Pibber” |
|||
| Kit #: AR 06 |
Preview by
Will Alcott
- will_alcott(at)yahoo(dot)com
Edited by Al Magnus |
|||
|
Mach 2
|
Vietnam Patrol Boat PBR 31 Mk. II “Pibber” |
|||
| Kit #: AR 06 |
Preview by
Will Alcott
- will_alcott(at)yahoo(dot)com
Edited by Al Magnus |
|||
 |
|
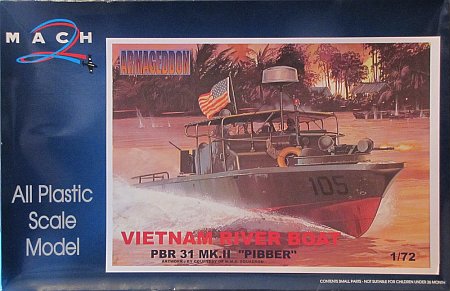
The name Mach 2 may not be familiar to most Braille scale armour modellers, but they are infamous amongst aircraft modellers for their limited-run injection moulded kits (Mach 2 also have released some armour and ship kits under the Armageddon brand). The contents of this kit will come as no surprise to anyone who has seen one of their aircraft kits. The thin box is topped with a dramatic colour painting of a PBR in action (familiar as the cover artwork of Squadron Signal's Riverine [1]). Inside, you'll find a single sprue of light grey injection moulded parts, a double-sided A4 instruction sheet, and three small sheets of decals. The injection moulded parts are typical of Mach 2 - a pebbly surface finish, lots of flash, large raised knockout pin marks, and a few short-shot areas. Just about all the parts will require a lot of cleanup and sanding to be usable. The instructions provide basic exploded views of the construction process, along with a few colour callouts. Hull Coxswain's Position Armament The 50 calibre MGs are recognisable as such, but replacement with better detailed examples (such as those from Dragon's Shermans) would make a huge improvement. The single stern gun lacks any spade grips, and part of the pintle mount was incompletely moulded in my kit. The bow gun tub is very basic, and the ceramic armour plates protecting the gunner are thickly moulded. Four M60s are provided (only 2 are needed). They are a little better than the 50 cals, but could easily be replaced with parts from an ESCI/Italeri or Trumpeter M113 ACAV. The four M16s would look OK if installed out of sight in their stowage racks on the bridge, but again suffer from soft moulding. Crew Decals Conclusions Reference: [1] Riverine A Pictorial History Of The Brown Water War In Vietnam, Jim Mesko, Squadron Signal Publications No. 6041, 1984, ISBN: 0-89747-163-6 |
| Back to Mach 2/Armageddon Kit List | Back to Home Page |
Article Last Updated: 07 January 2012 |