|
Preliminary remarks
- In this review I only used the
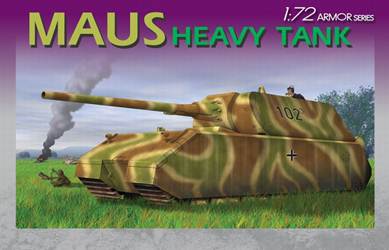
hull of the Dragon kit, which has been previewed here.
- The turret from the Dragon Maus
is very similar to that in the Dragon E-100, which was reviewed
here.
- The turret for this construction
review comes from the Cpl Overby's E-100 Ausf.B.
- The result is purely fictitious.
Construction of the Dragon Maus
hull
Given the size of this kit, there are actually few parts and construction
is extremely simple. So simple, that I forgot to pay any attention
at all and made some embarrassing noob mistakes.
- I installed the main hull part (A2)
backwards. In hindsight I am not sure how this happened, but as
it is almost symmetrical, I guess I just wasn't paying enough attention.
This means that my drive sprockets are now at the front, instead
of the rear. It might also be the reason why the tracks almost touch
the rear fenders, even though pictures of the (correctly ?) assembled
kit on the side of the box make me think that it would have been
a tight fit anyway. Speaking of fit, it would be best to thin the
side hull plates a bit in the areas where the tracks pass as the
tracks tend to have very little place to spare.
To hide my mistakes a bit, I decided to add small extra fenders
at the rear.
- I decided to fit the side hull plates
(E1 and E15) before installing the tracks, sprocket and idler as
I thought it would speed up assembly and painting. It didn't, quite
on the contrary, and next time I build this kit I will surely fit
the tracks first. Speaking of tracks, about half of them will be
perfectly hidden. I decided to cut that part away, firstly because
otherwise there was no way I could install the tracks using my building
sequence and secondly, because I have the idea of using these as
spare tracks for a future Maus.
Other remarks that are less painful
are the following:
- The main lower hull part (A2) has
open sections, for reasons unknown to me. I decided to blank them
off, to avoid a see through effect.
- PE mesh is provided for the rear
louvers, but not for the front, so these were blanked off as well.
- I think that part E18 and E19 have
been switched in the instructions, even though, in this case, this
is a matter of the pot calling the kettle black.
- There is some detail on the inside
of the driver's hatch and it can be opened. No interior is given,
though.
- Three headlights (E12) are given,
only two are needed.
- Three tow hooks (E9) are given,
only one is needed.
I decided not
to measure the kit for accuracy as I don't have detailed scale plans
for this vehicle (yet).
_t.JPG)
A
collection of bogies.
Construction of the Cpl. Overby
E-100 Ausf. B turret
This
turret is part of kit MP054 and as such has spare tracks for the E-100
molded on the turret sides. These were carefully cut/sanded off. Holes
for the rangefinders (on the front of the turret) were drilled out.
It helps that the resin is almost plastic-like in its hardness.
_t.jpg) _t.jpg)
It is remarkable how Cpl Overby manages to cast parts as big as this
without warping and with very few pinholes. I counted three that were
easily filled with some stretched sprue and superglue.
I did notice that the rear of the turret (just in front of the weld
beads) was not perfectly parallel to the rear plate. An incision and
small strip of plastic card remedied this.
As the turret has very few pieces, assembly was quick. Most of my
time was actually taken by the need to remove the tracks. Note that
the kit comes with two types of gun barrel (with and without muzzle
break) and are perfectly straight, in spite of their length.
I decided
not to measure the turret for accuracy as it is completely fictitious.
_t.JPG)
_t.JPG)
_t.JPG)
_t.JPG)
 _t.JPG)
Review samples purchased by the
author.
|
