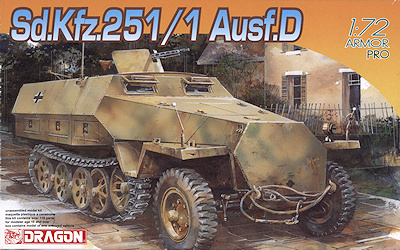
| Sd.Kfz.251/1 Ausf.D | ||||
| Kit # 7225 | Review by Doug Chaltry | |||
| Sd.Kfz.251/1 Ausf.D | ||||
| Kit # 7225 | Review by Doug Chaltry | |||
 |
| One
of my local model clubs was having a group build project
with the theme of "Captured Vehicles". I was
getting a little tired of painting only green tanks, so I
decided to take part in the exercise with this German
halftrack that was captured by the Polish Home Army
during the Warsaw Uprising of 1944. But my free time for
the past several months has been greatly curtailed due to
several personal crises, and consequently I didn't have
much time to build and paint the kit, so unfortunately, I
didn't approach the project with an eye towards writing a
review for On The Way, which I now regret. Thus, I have
no in-progress photos of the kit build, only pictures of
the completed model, plus some scans of the instruction
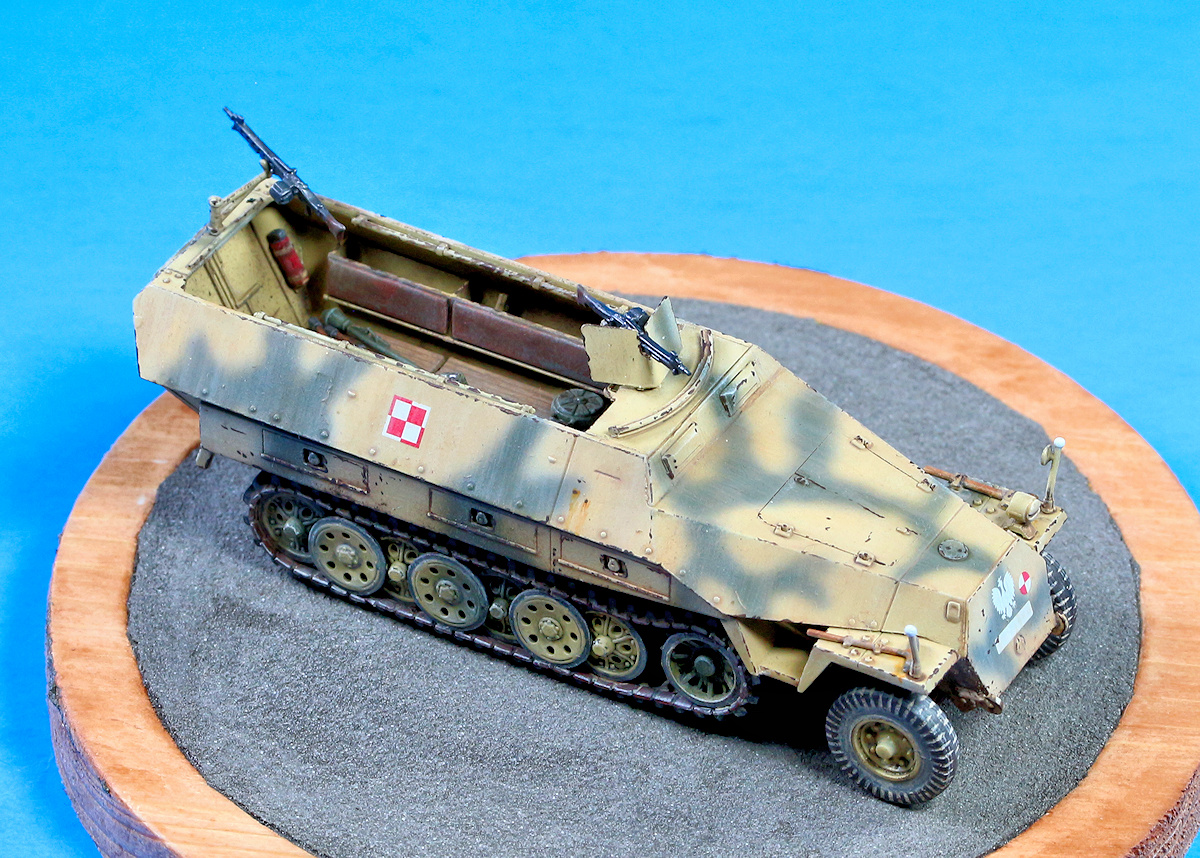
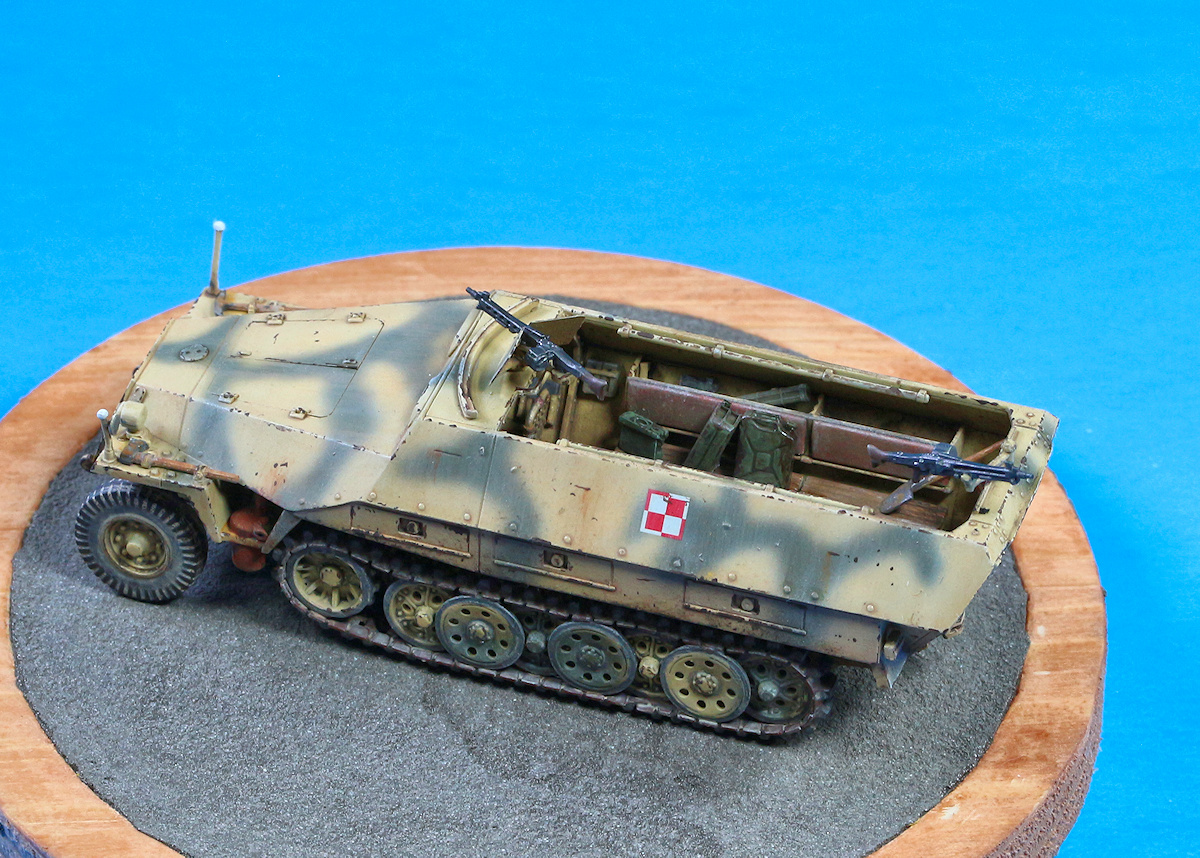
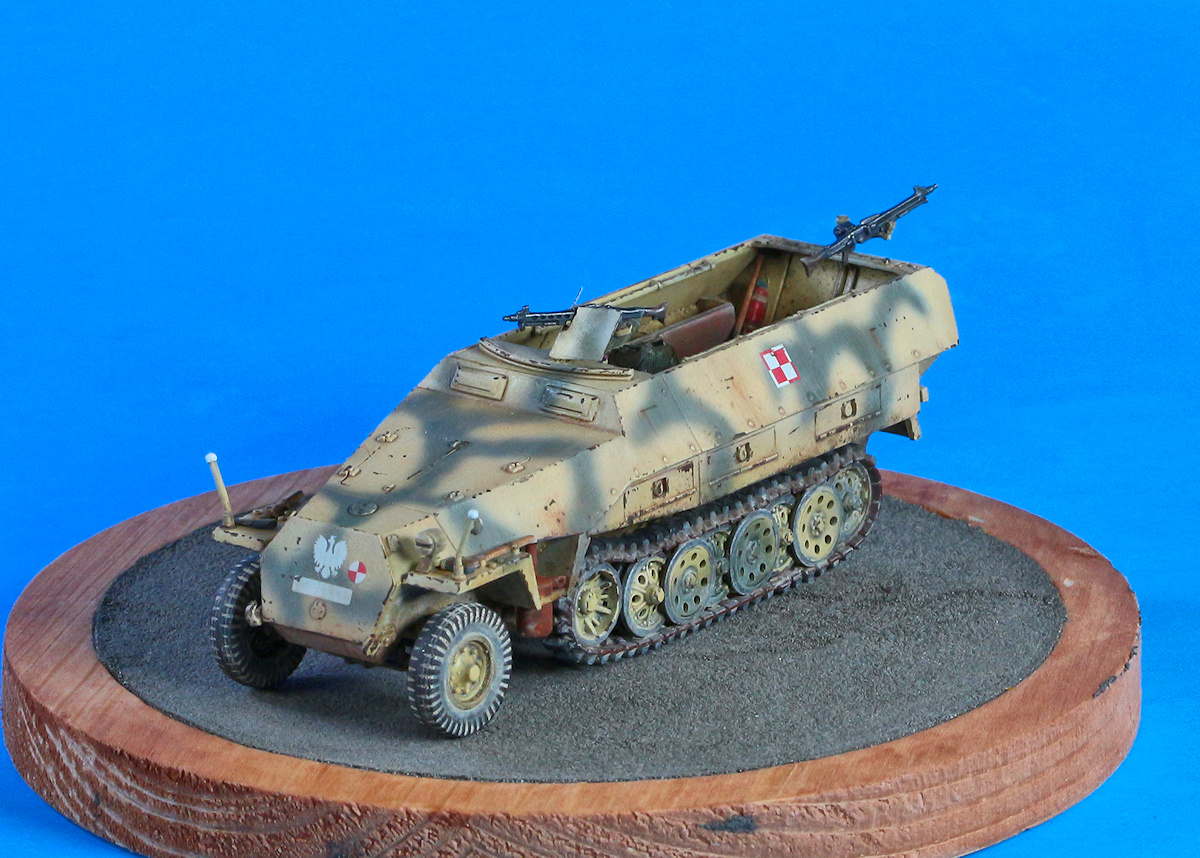
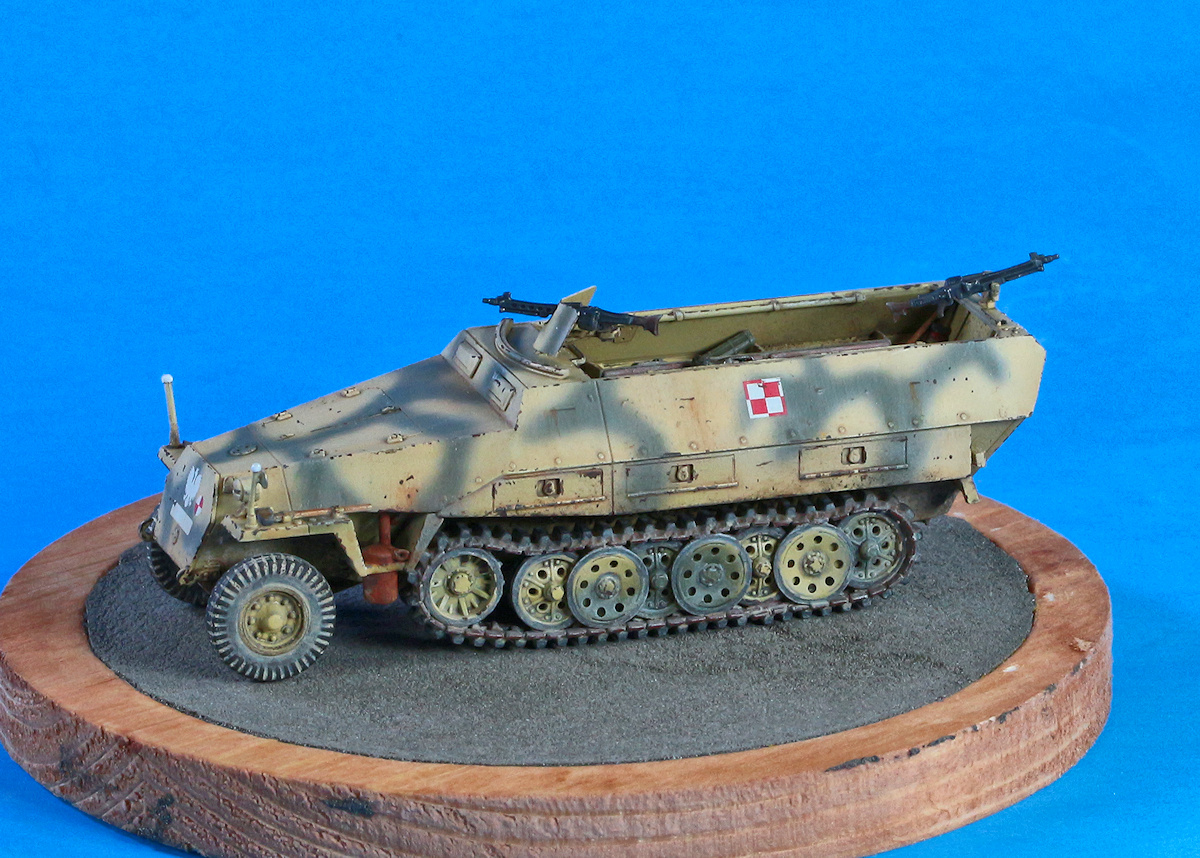
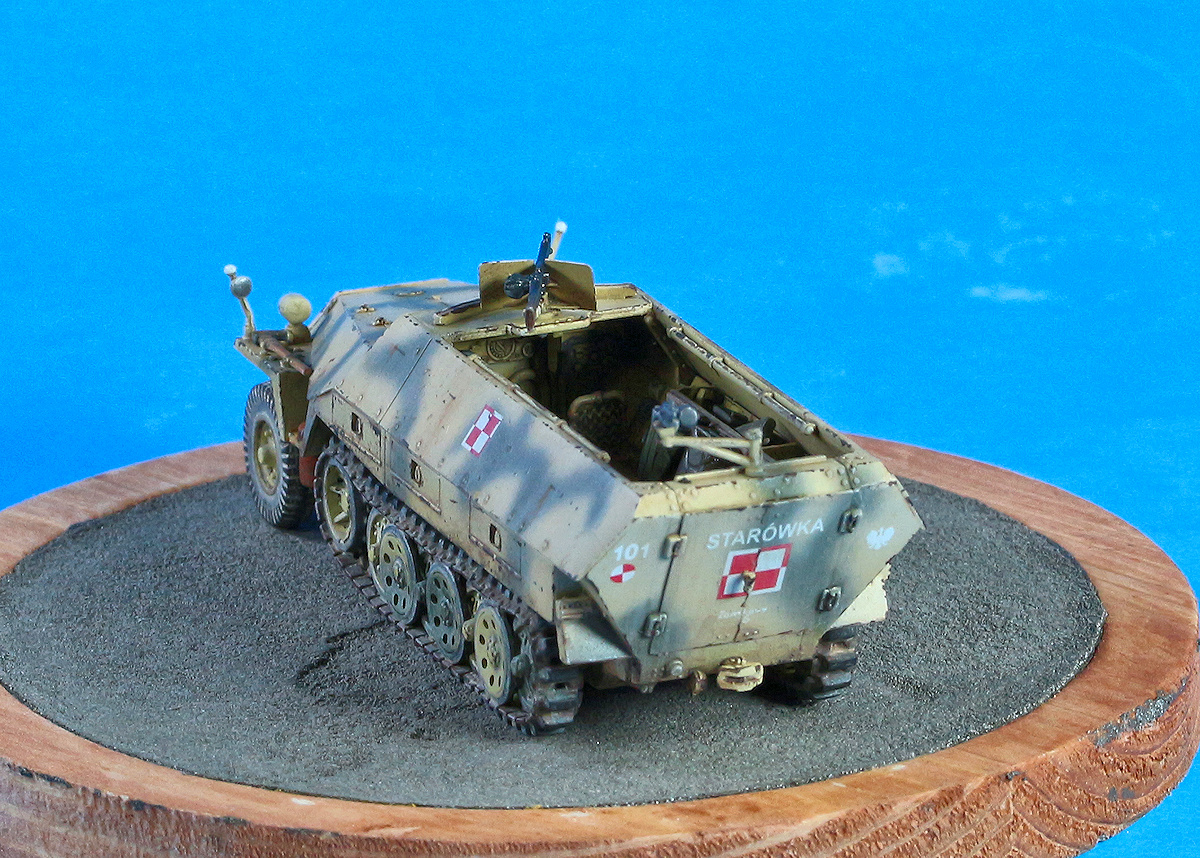
sheet pointing out some issues that I had with the kit. But it's no great loss, as we have a superb in-box comparison article of the Dragon Sd.Kfz.251 series by Rob Haelterman and Stephen Brezinski that you can see here, where you can see scans of all the kit sprues, and much general information on the entire series of kits, as well as specfically for this release. Rob states within that article that there are very few construction reviews of this kit here at OTW, so hopefully this will help to alleviate that situation, even without any in-progress photos. As I mentioned, I was in a hurry to build this kit, so I did not undertake the extensive research that I normally do when building a model for review. I decided to look at my reference material and to do a Google search for it only after the kit was substantially built and the painting had already begun. And wouldn't you know, one of the search engine hits was to an article right here on OTW, written by Stephen Brezinski who modeled the exact marking scheme I planned to build (though he did some creative switching of decals with the Hasegawa 251 kit that he build alongside the Dragon kit). See his article here. I'm not sure why I chose to research the vehicle so late in the build, but the consequence of that delay is the recognition of the inadequate markings in the Dragon kit, plus some specific modifications that I should have done to accurately represent the captured vehicle, which Dragon does not mention in the instructions. Thus, the end result is not a 100% accurate representation of "Starówka", the name of this captured halftrack. But even though it is not entirely accurate, I am quite happy with the result of my build efforts regardless. I'll begin with listing some issues with the Dragon kit.
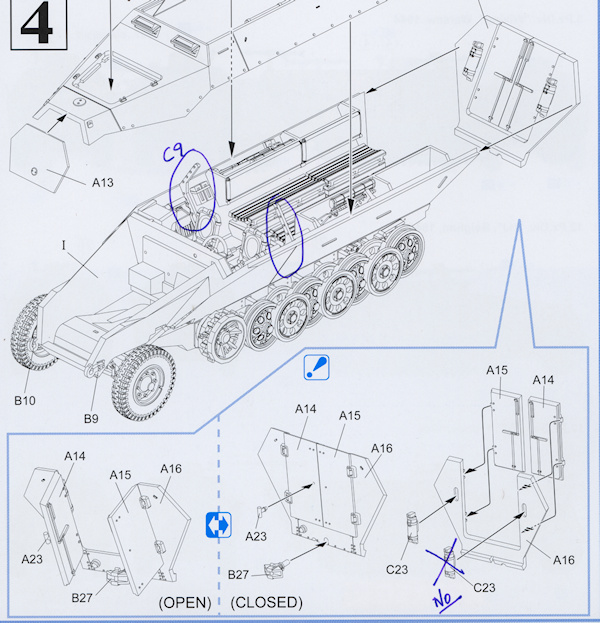
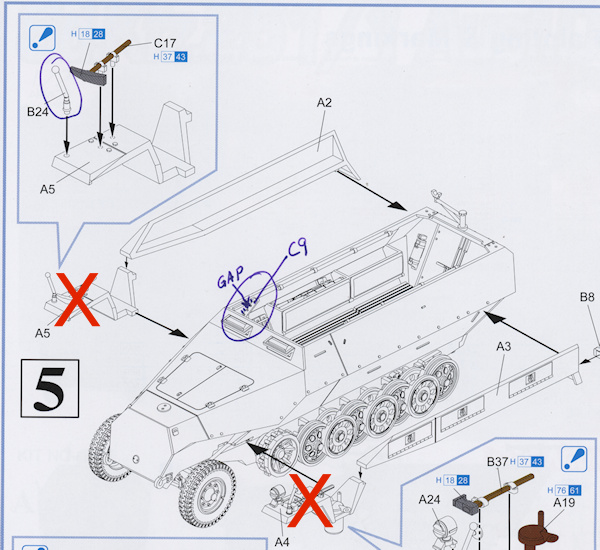
Referring to the above image, you'll see two areas that I marked up. First, the two parts labeled "C9" (the bolted flanges that connect the front superstructure to the rear body of the halftrack) are tricky to get into the correct position. I attached them as shown in the instructions above with the back angle of the piece lined up with the top edge of the lower hull part. But if you do this, when you attach the upper hull to the lower, you will have about a 1 mm gap between part C9 and the inside of the upper hull wall. In other words, the back of C9 does not make contact with the upper hull. This problem arises because the upper hull piece is wider than the lower hull piece, and they do not join making a perfect angle in the interior of the hull. I don't know if this is a design flaw of the kit, if I mistakenly attached them in the wrong spot, or if it accurately represents how the real vehicle was built, but either way, you need to plan around this issue. When I build my next 251, I'll simply attach these parts a little bit higher up. To get the ideal positioning, it would be good if one could attach these parts after joining the upper and lower hulls together, but that could be very tricky to reach inside the closed fighting compartment with the part held in your tweezers, not to mention it would complicate the sequence of painting, which pretty much requires you to paint the interior before joining the hull parts together. What I ended up doing was to use my tweezers to bend the top of C9 up to where is makes contact with the upper hull wall, and superglue it in place. So far, it's holding. The second point illustrated in the above scan is that you should not attach the fire extinguisher (part C23) to the right side of the rear doors (if facing the doors from the inside of the vehicle). No versions of the 251 halftrack mounted two fire extinguishers inside the fighting compartment, and only the Sd.Kfz.251/7 engineering vehicle had it mounted to the right of the doors; all other versions of the halftrack had the extinguisher only mounted on the left side of the doors. Be sure to fill in the locator hole on the right. The scan below further illustrates where the gap is located behind parts C9. Also circled here are the width indicators (or "curb feelers"); even though these parts are molded more finely than in most other kits that have them, I feel they are still overscale. They look chunky, and it's difficult to sand off the mold seam from them. The best (and most expensive) option would be to replace them with new set by Master Model, which are absolutely gorgeous. But it is also quite simple to scratchbuild your own replacements. But... all of that is a moot point anyway, because of the biggest oversight in the instructions, and that is, Starówka did not have any front fenders (the red "X"s in the scan below). Photo evidence of the real vehicle makes this very clear. Of course, we would have to figure out what the empty wheel wells would look like without the fenders on, particularly where the exhaust pipe exits the engine compartment.
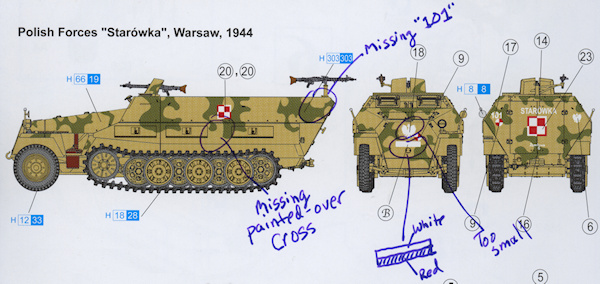
And that's pretty much all I have to comment on for the construction of the kit. It was a pleasure to build and is a highly detailed and very fine kit. But for the markings, there are a few deficiencies as well for this particular paint scheme. As indicated on the following scan, there should be a small, white "101" (a little bit larger than the one on the rear hull) in the upper rear corners of the sidewalls, on both sides. On the left side of the vehicle, there is a white-ish smudge in between the storage lockers. Since it is where the German cross is normally located, I assume it's where the Poles painted over the cross. I can't tell if there is one on the right side from the single photo I've seen of it. The markings on the nose are not great either. The eagle symbol is much too small, and the blank, white horizontal bar is not a license plate, but rather an elongated Polish flag that I assume was meant to cover up the German license plate. So this bar should be longer (from left to right) and a bit wider top to bottom, with the lower half painted red. It would also be lower down on the nose plate to accomodate the larger eagle marking.
I found this photo in several places on the internet, so I assume it open source:
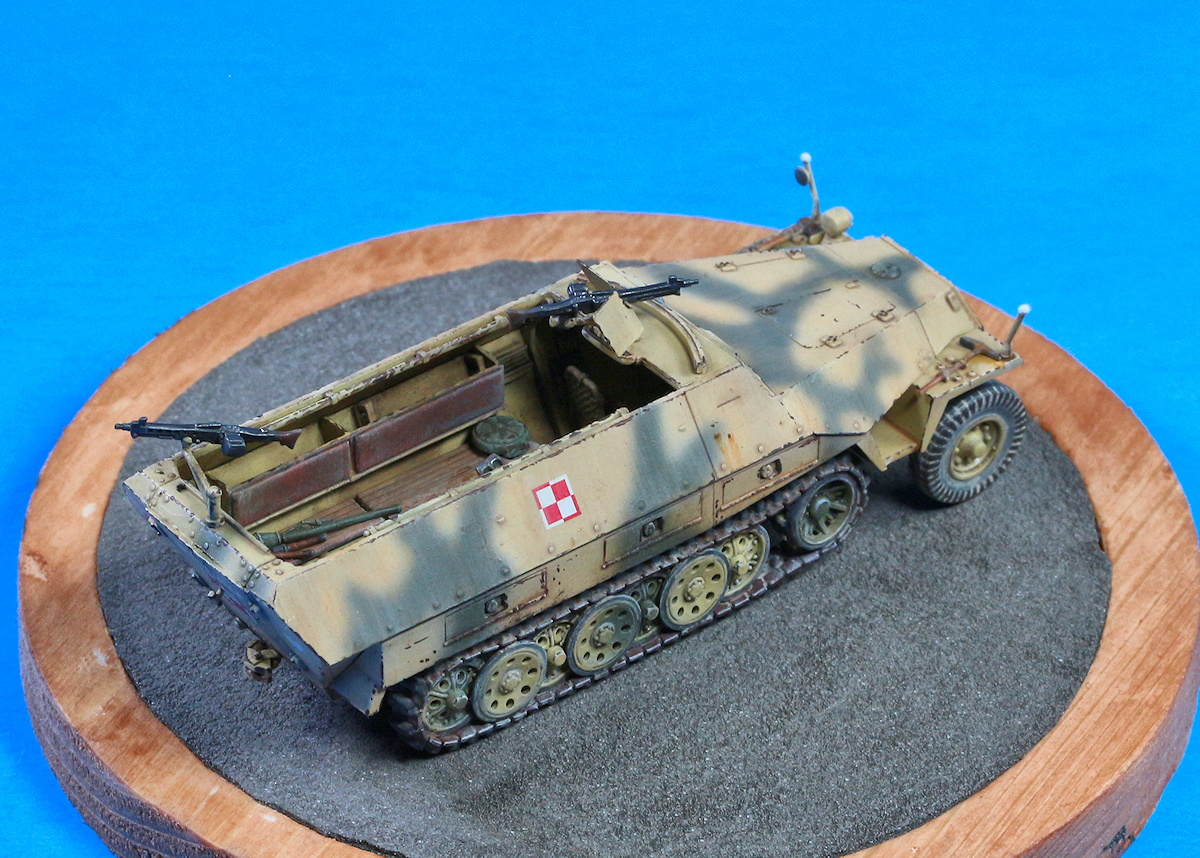
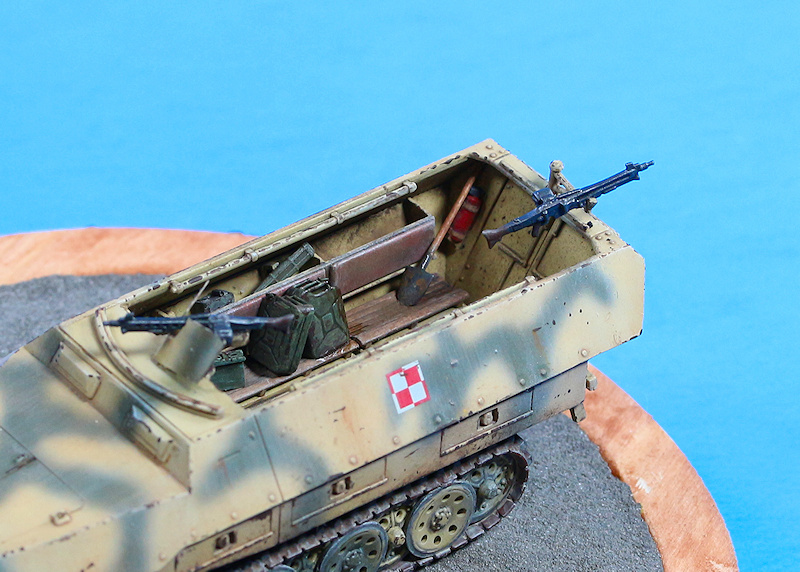
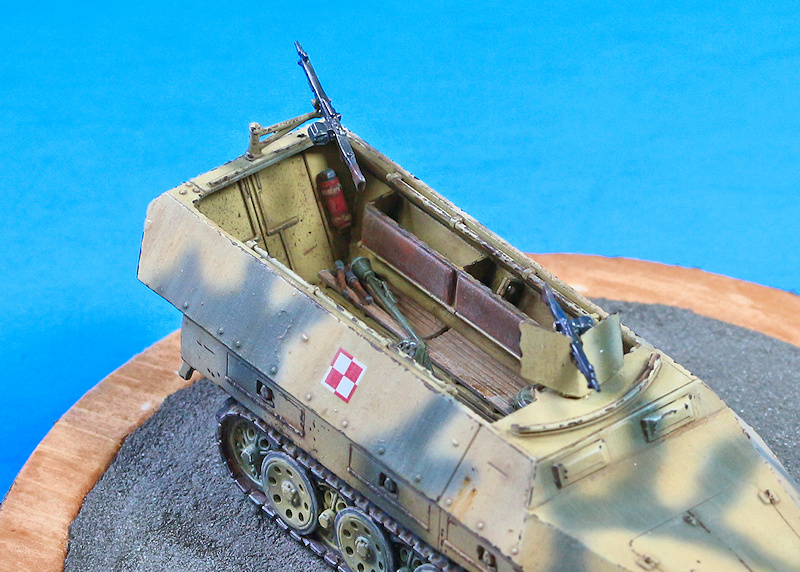
I painted the model with the new ATOM paints from AMMO, which I like very, very much. I weathered it with a variety of filters, washes and pigments. None of the photos of the real vehicle show any machineguns mounted on it; this is a "what-if" version of it. Likewise, the equipment inside the fighting compartment is entirely conjectural, just a bunch of things that I assume street fighters would likely need. The items come from a variety of sources, some resin, some 3D-printed, some plastic. Note in the rear-view photo below you can see that I failed to paint the driver's instrument dials, because I had assumed that one would not be able to see inside the driver's compartment to notice the oversight. That will teach me, I guess. All in all, I am very happy with how the final product looks, even considering the accuracy errors. I have a set of decals from TORO Model that include the accurate markings for Starówka, so I will likely give this one another go in the near future and make a more accurate representation of this half-track.
|
| Back to Dragon Kit List |
Back to Home Page |
| Article Last Updated: 30 September 2025 | Back to Construction Review page |