| Preliminary
note: the preview of this kit can be found here.
While Braille Scale modelers are still
waiting for a plastic kit of this highly popular vehicle, at least
some resin manufacturers have come to our aid. Modell Trans is one
of them.
1. Casting quality
Casting quality of a resin kit varies
with the age of the molds. I bought my kit the same week as it was
released, and as such I found that most parts were very finely cast.
I say most, as this assessment holds for the hull and turret, but
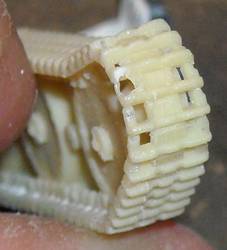
less so for the running gear. The tracks, idler and drive sprocket
had quite some flash, some tracks were imperfectly molded and some
detail was marred on the roadwheels. The masters for the tracks are
clearly made by assembling individual track links, but these are not
always 100% straight. I guess that's why the Russians invented mud
in the second world war.
The top of the hull also had some pinholes, but most were hidden by
the turret and the others easily filled. I also noticed that the top
plate is slightly concave, but once again the turret goes a long way
in hiding this.


2. Detail and accuracy
I am not claiming my research to be
PhD quality, but I found some minor errors in this kit:
- The lateral air intakes (or are
they exhausts ?) are equal in size in the kit. In reality they
differed slightly from one another.
- The mesh on these same intakes
seems to be flush on the real vehicle. In the kit they are recessed.
- While you might have heard that
the rear air exhaust (or is it an intake ?) had a mesh, which
the kit lacks, wise men have apparently come to the conclusion
that this mesh was a field modification which was sporadically
observed. Ergo, the kit is right.
- The muffler needs to be lowered
a bit.
- The lift hooks on the turret are
underdefined.
- The tracks are of the wrong type.
It seems Modell Trans used Panzer IV tracks.
- The running gear runs too close
to the fenders (too little vertical spacing). The rear mudflaps
are angled too much downward (and are asymmetrical in the kit),
and the idler is positioned too high, which means that the idler
comes even closer to the fender/mudflap. All this alters the "look"
of the vehicle.
- The front mudflaps are missing,
but these might have been lost in combat.
- The driver's and radio operator's
visor are both open. The periscope holes are there, but they are
not properly aligned.
- As mentioned in my preview,
this kit most likely represents a vehicle produced in September-November
1942 depicted in the spring of 1943, after the disappearance of
the Nebelkerzen and before the removal of the second Bosch headlight.
Removing the small Orterkompas mounting will then be necessary.
Optionally, one could opt for adding home-made Nebelkerzen.
As according to [2] there were only about 16 vehicles built with
the small hatch, and 9 Pz.Div. was the first division to be equipped
(with 18 vehicles), it seems a fair assumption that all the small
hatch vehicles went to that unit.
- According to my references the
vehicle scales out between 1/71 and 1/73, depending on the location
of the measurement.
3. Construction, additions
and modifications
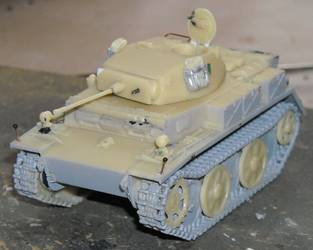
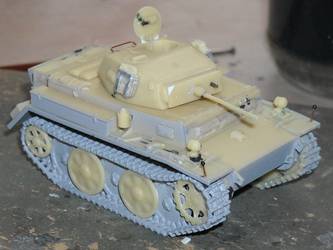
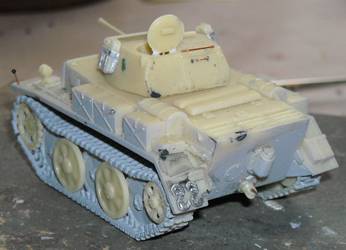
Construction of this kit is not difficult,
mainly because of the limited number of parts, but it might have helped
if Modell Trans had given us just a tad more than a four view drawing.
Nothing in the way of a construction assembly or paint schemes are
given, nor are decals.
In my example the rear radiator was
slightly damaged, but the broken part was still there and was easily
glued back in place. One of the corners of the gun mantlet was broken
off too, but as I did not find that fragment, I repaired it with a
small piece of styrene (see pictures above).
The running gear is a single piece, except for the outer roadwheels
and outer halves of the idler and drive sprocket (the parts not primed
grey in the pictures above). Quite a bit of flash was present, especially
on the idler and drive sprocket; cleaning all this up took about half
of the assembly time.
During construction, I added the following
items:
- Tow coupling (from scratch);
- Starter crank cover on the rear
hull plate (from scratch);
- Jerrycans on the turret (from the
spare's bin with tin foil supports);
- Width indicators (scratch);
- Grab handle for the rear turret
hatch and above it (copper wire);
- Antenna mount to the side of the
turret (styrene);
- Notek (from BP resin, I believe);
- S-hooks (from MR Models);
- Hinges and rotating handle to the
turret hatch;
I modified the following:
- periscope holes for the driver;
I filled them out and drilled new ones as the ones in the kit are
not perfectly aligned
I removed the following:
- Orterkompas on the turret roof,
to make the turret roof consistent with other features of the kit
I replaced the following:
- MG. Not that the kit part is bad,
but it's too long and of the non armored variety. I used one of
the sublime Aber barrels.
I goofed up the following.
- I installed the turret hatch inside
out, and only discovered this after I had added all the extra detail
and painted the kit. Fixing it took me quite some time. This is
one example of where a decent manual would come in handy.
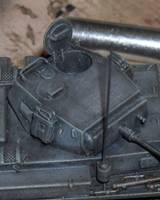
Above: turret hatch installed inside out
4. Painting and markings
Painting was done using Humbrol and
Revell enamels over an automotive primer. Very few markings were added.
The Balkenkreuze are Archer's.
No unit insignia were applied.
A figure was added from the spare's box, as the simple cylindrical
recess in the turret for the commander really needs to be filled in
with a figure if you leave the hatch open.
5. Conclusion
A fine kit as resin kits go, marred
by non accurate tracks and a suspension that makes the vehicle sit
too low. Nevertheless it is the best kit of this vehicle in 1/72 I
have seen so far.
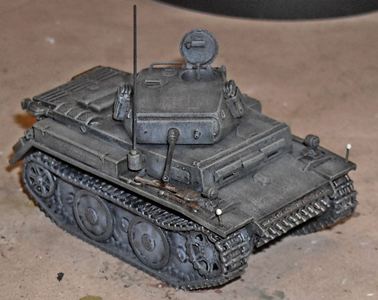 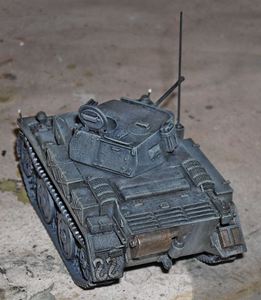 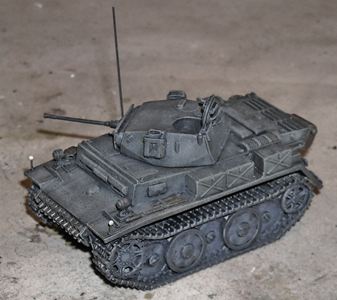
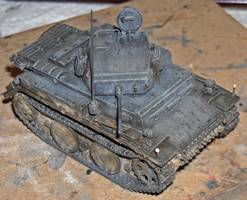 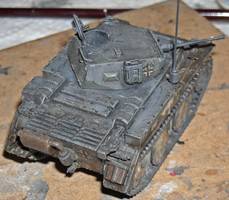 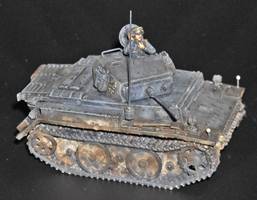 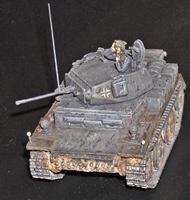
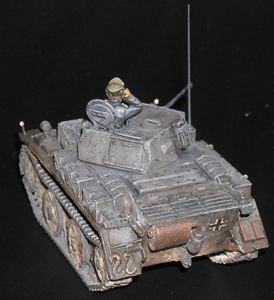 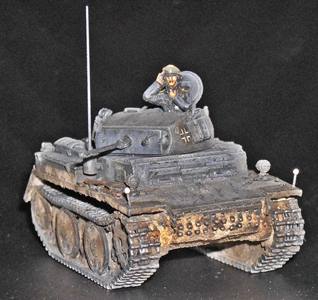
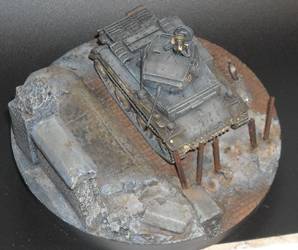 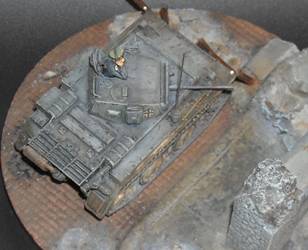
The base is an HQ72 item, slightly modified with extra obstacles made from an old Esci set.
6. References
[1] Achtung Panzer No7, Pz.Kpfw.I /
Pz.Kpfw.II series and variants, M. Bitoh, Dai Nippon Kaiga, 2002
[2] Panzer Tracts No 2-2, Panzerkampfwagen II Ausf. G,H,J,L and M,
T.L. Jentz & H.L. Doyle, Panzer Tracts 2007 |