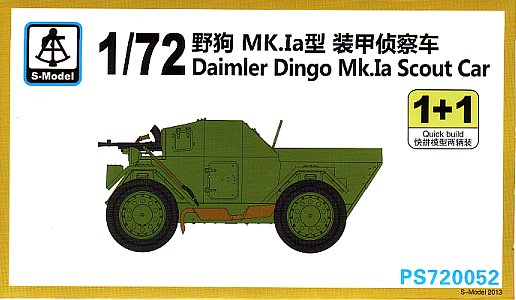
| History
From [1]: The Daimler Dingo was a small 4x4 reconnaissance/liaison
armoured car, of which something like 6,600 were produced between
1939 and 1945.
There were five versions:
Mark I - 4 wheel steering and sliding/folding roof hatches without
tubular support
Mark Ia - as Mark I but with pivoting/folding roof hatches with tubular
support
Mark Ib - as Mark Ia but with revised engine cooling, presumably identical
to Mark II
Mark II - front wheel steering only and revised engine cooling &
engine deck
Mark III - waterproofed engine, smoke grenades and open topped.
Ford Canada produced the visually similar Lynx which was 510mm longer
and one tonne heavier and Italy built an unlicensed copy, the Autoblinda
Lince.
The Kit
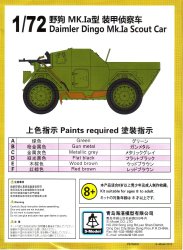
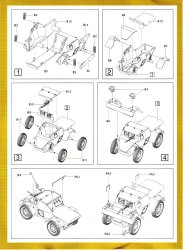
As to be expected this offering from S-Model comes in their familiar end opening box containing two kits. Inside you get an instruction sheet covering four steps in
exploded diagram style, a small decal sheet, one fret of photo-etched parts and 4 sprues (two each of Sprue B & Sprue T) in a dark green styrene like plastic.
Sprue B contains 22 pieces for the Dingo. Sprue T has ancillary parts, including the shovel, a helmet, a rifle, a different set of lights plus a few other pieces
that I can't identify.
Parts detail is excellent once again and as usual there are a few faint seams on some of the pieces. A look at the parts shows that this is indeed a Mk.Ia as
per the description from reference [1]. This is also a quick build kit so S-Model has not included an interior and continues the S-Model tradition of
having a simplified suspension. As part of my research I often compare what's available in the 1/35 scale world with new releases in 1/72 and it appears to me that
this kit is pretty much a scaled down and simplified version of the Miniart Dingo. It even copies most of the decal options for the Miniart kit.
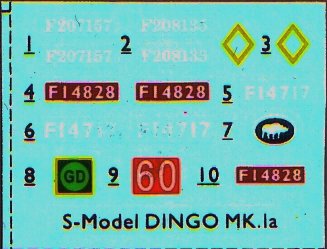
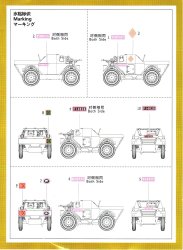
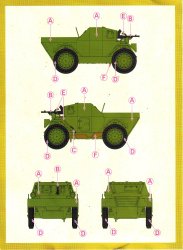
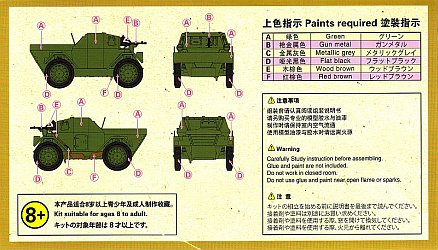
Decals and marking options are for four vehicles all in overall green camouflage. As I have found in previous S-Model offerings the decals look to be excellent
once again.
The instructions indicate where to locate the transfers but do not identify any particular unit, though two unit badges are shown. Not being to confident
with what S-Model's colouring and marking directions I surfed the web to see if I could find better information regarding the markings. This is what I found,
keeping in mind that I could not find any supporting period photographs for any of the options.
- F208135: Nothing was discovered regarding this vehicle.
- F207157: This appears to be a Headquarters vehicle of the 1st Northampton Yeomanry, 20th Armoured Brigade, 6th Armoured Division,
UK 1941. The decal sheet appears to be incomplete for this vehicle. It is missing a second HQ diamond and also the mailed fist emblem of the 6AD. Camouflage should also be two
tone dark brown & khaki as well and not an overall green. (reference [4])
- F14828: From the 8th Armoured Division in North Africa, 1942. It should be in overall desert tan and not overall green. The decal has the unit
emblem wrong. It should be a "GO" on a green background, but S-Model has mis-printed it as a "GD" on a green background. (reference [2])
- F14717: From the 22ndArmoured Brigade, 1stArmoured Division, UK 1941. It should be in dark brown & khaki and not overall green.
(reference [2])
Well, without much for decal resources to modify the box stock set, and seeing as S-Model wanted to be a Miniart wannabe, I figure I would play along
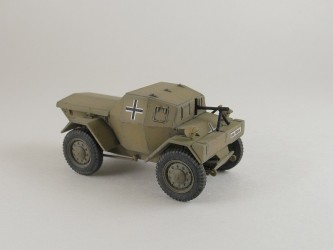
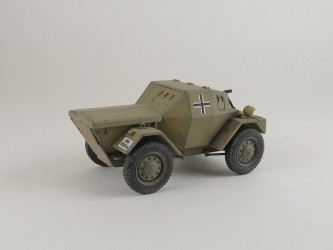
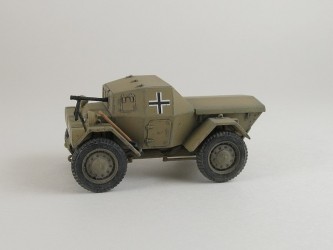
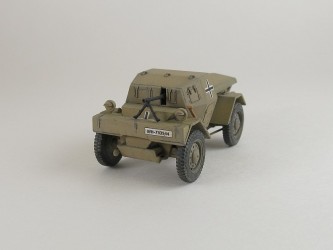
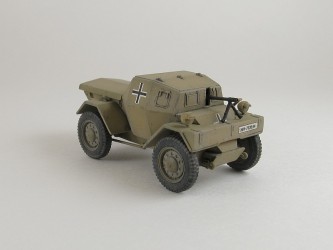
and build my Dingo as a leichter Panzerspähwagen Mk.I 202(e) and follow the markings as found in their kit no. 35082. This meant backdating the kit as a Mk.I. which is easy
to do by simply deleting the support for the folding roof panels. And to make it German I needed an MG34 from my spare parts box and some WH plate decals.
The Build
Note that the shovel is part T4 and not B4 as shown in the assembly diagram. There is one minor error with the wheel hubs. They have 10 circular openings
and another small indent for the filling valve. What they should have is 9 openings with the air valve indent.
As mentioned above, the kit has no interior. For those that wish to detail the interior then there are some large ejector marks
to remove and a floor and bulkhead to be added. Finally a set of seats, dashboard, steering wheel and radio etc. A lot of work in a very small space! Liberating parts
from the Matchbox or Ace Dingo kits would probably ease the amount of work required here.
Not wanting to go this route I decided to button up my Dingo. Fit was excellent throughout and only a minimal amount of work needed to remove the few mold seams
I found. Construction was very straight forward and once I got the major body parts in place I went about scratch building what detail I could to the exterior.
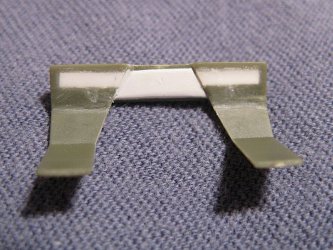
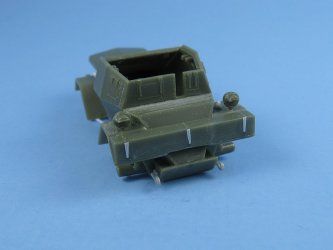
The backside of the glacis mounted storage bin is hollow so it was filled in. This bin also lacks the prominent hinge leaf that run vertically down the front
of the bin. These were cut from paper thin plastic sheet and glued in place adjacent to the existing hinges molded on the top surface of the bin.
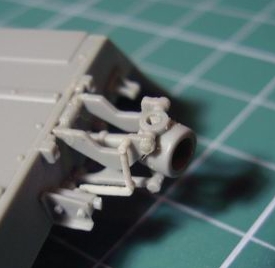
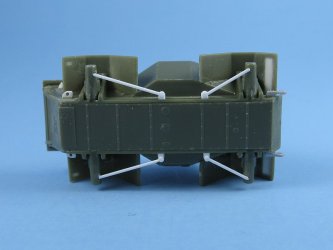
S-Model has greatly simplified the suspension. The model only has thick stubs for the axles and completely lacks the complicated wishbone style arms and drive
shaft seen in the 1/35 scale Miniart Dingo (see picture above). I settled on just adding the missing steering linkages to both the front and
rear axle stubs as this was to be a Mk.I Dingo with 4-wheel steering.
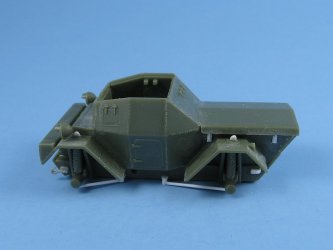
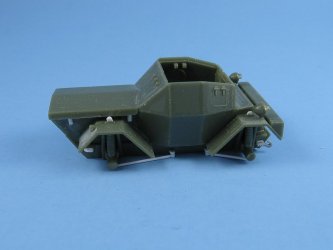
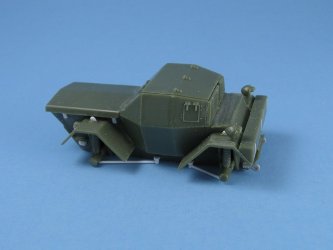
Most of my building time was spent on adding a lot of the small detail missing from the kit. This included scratchbuilt pair of rear tow loops, a set of four engine cover
hold-downs to the flanks of the rear body, a pair of front tow hooks scavenged from the spare parts box and a starting crank receptacle drilled into the center of the
lower rear panel. As this was to be a beute Dingo an MG34 with a bi-pod mount was taken from the spares box. I also added weld lines along the panel joints of the body.
The last item was drilling out the holes in the rear light mounts.
There is a large wedge shaped protrusion located low on each of the rear fenders which I was unable to find in any of my reference pictures. Before removing them
I filled the sink marks on the underside of the fender beneath these protrusions so there wouldn't be a hole in the fenders once the protrusions were removed.
I didn't find the PE fret of much use. Outside of the fact that my Dingo didn't need the support for the folding top panels, as is the case for a lot of PE
parts, they are much too flat. I would suggest this support be replaced with a scratch built item for those wanting it on their Dingo.
Conclusion
This kit is in my opinion a small step back on S-Model's part though it is still a nice kit. The lack of interior and the poor decals make it
somewhat of a disappointment following the quality shown in some of their other more recent releases I've purchased, like the Jeep and 37mm M3 anti-tank gun.
This is a great model for the war-gamer but more of a fixer-upper for those wanting something a bit more detailed.
References
[1] Daimler Dingos in the Malayan Emergency, Ley Reynolds, self published
[2] Primeportal.net (Miniart Dingo Mk.Ia sprue & decal photos)
[3] Miniart web site (leichter Pz.Sp. Mk.I 202(e) photos)
[4] Britmodeller.com (Miniart Dingo Mk.Ia build blog)
[5] Encyclopedia of German Tanks of World War Two: Revised Edition, Peter Chamberlain and Hilary Doyle, Arms & Armour Press, London 1978. ISBN 1-85409-518-8
Review sample purchased by the author.
S-Model kits can
be purchased from

|
