|
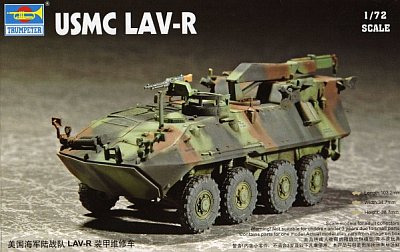
I'll start differently by beginning with the box top. You'll see a completed model on the top and on the sides some very nice color
views of the camouflage
scheme. I would keep these if you are using this scheme as it gives a top view of the vehicle, which should be very helpful. The notes on the box side
describes the LAV 25, not the LAV-R.
There are 67 parts to be used, with eight LAV hubs, one wire cutter and a jerry can for the parts bin. No detail is present underneath
the top hatches, but the
rear doors do have latches on the inside. Alas, any cutting of the doors would damage the detail. The eight tires are rubber. I found only a few sink marks
that may be visible; 2 on the crane and one on a piece that is mounted above the rear doors.
You are asked to begin assembly with the bottom of the two piece hull. I flubbed the installation of the rear axle arms. A very tight
fit bent the arms.
Some test fitting and trimming may be needed here. The front wheels are posable, but not the rear. There were no problems assembling the top half of the hull.
I was afraid that putting the top and the bottom hull halves together would leave a seam, but they went together flawlessly.
This is a definite “afternoon builder”. I might have put 3 hours, probably less, to get this far with the kit.
There is a lot of room for improvement if you find that you cannot live with the solidly molded grab handles. The other area that needs more important work is
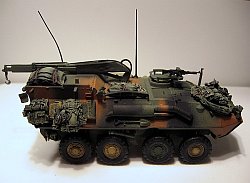
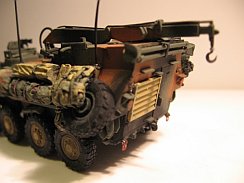
detailing the crane. A lot of hoses need to be made to make these whole 3 pieces(!) look realistic. I made some hoses for the jib crane out of stretched
sprue and added them before painting. Consult your references for placement.
I left the wheel hubs off until I painted the plastic and then snapped the pieces into the rubber tire.

| I compared 3 kit wheels from different companies (Trumpeter, Black Dog and Ace). They are all nearly alike in height and width, with the exception of the ACE kit wheels,
which are very “fat”. |
Antennae were made with stretched sprue.
Two small tow shackels from a Dragon Sherman were taken from the spares box and placed on the rear hull bottom.
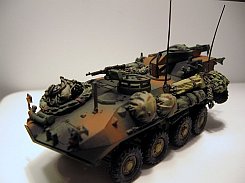
I airbrushed a 3 color scheme using the box cover as a guide. I used Life-like colors which are dead flat, and PollyS Army/Marines Gulf tan for the sand color.
Then, for the lived in look, I used the Black Dog LAV-25 resin accessory set. Everything in the set was used except one long roll and the large “clump” of gear
that is meant to go on the LAV-25 turret. I weathered the wheels with Gunze Hemp and made small streaks on the vehicle with the same color.
Most of the decals would have been covered up with the gear, so I left them all off.


|

