|
Early on in the re-arming of the German forces following World War One, anti-tank guns were a big part of the German tank defense plan. By 1943 it was becoming
obvious that current anti-tank guns and their involved production were not able to keep up with the growing demand for tank killing weapons from the various fighting units. One solution was the
8.8cm Raketenwerfer 43, nicknamed "Püppchen". This was a small two-wheeled gun that fired an 8.8cm rocket-propelled, fin-stabilized projectile with a shaped charge warhead much like
that used by the Panzerschreck (another rocket laucher similar to the American bazooka). Production was started in late 1943, but the numbers built were limited to around 1,000 units due to
the fact that the Panzerschreck and Panzerfaust were proving to be about as effective at knocking out tanks and much easier to produce and operate.
The Kit:
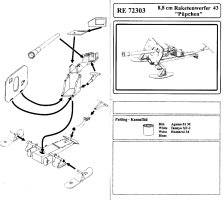
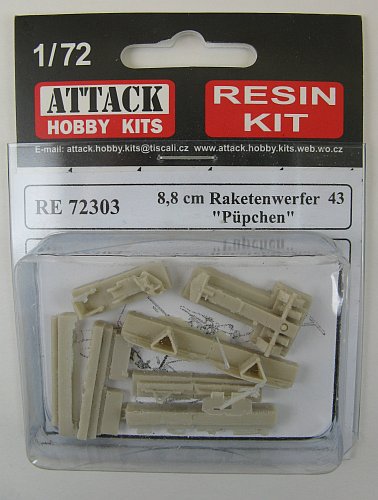
Model kits don't come much smaller than this one. The kit is packaged inside a clear plastic blister pack stapled to a cardboard header. Inside are 12 cream coloured resin parts. The
instructions are in exploded diagram format printed on one side of a small piece of paper. No decals are included.
I spent a lot of time inspecting this kit through the clear cover trying to determine its worth. The hobby shop where this was purchased had four copies of the Püppchen (this one with the skis and three
others with wheels). I settle on this kit as the wheeled copies looked even worse. (As an aside: I offered to purchase the other three copies from the owner, admittedly for a much reduced price,
with the thought that out of the three sets I could salvage two good wheels. My offer was rejected with the reply that he'd rather have the kits tossed in the garbage dump after he dies than take a big
loss on them now. Oh well, can't blame a guy for trying!)
 |
 |
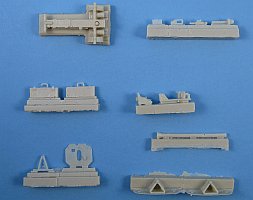
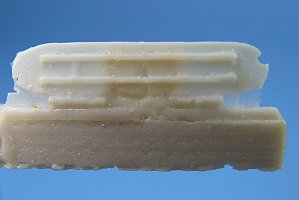
| Pictured above is an overhead shot of the carriage with side views of the other parts. They are rife with pin holes.
Flash is present but not to a large degree. Also evident is the incomplete casting of pieces resulting in voids in the resin as seen by the notches in the edge of the shield and
the missing section of handle on one of the ammo cases. |
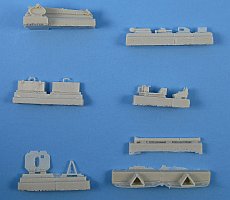
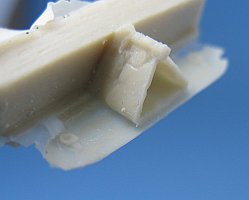
Another picture of the parts, showing a side view of the carriage and with some of the other
parts flipped the around.
Pin holes are evident everywhere in this shot as well. The detail on the parts is excellent and the parts would have been splendid if not for the atrocious resin casts. |
The Build:
It was obvious, that even though this was the best copy available for sale in the shop, it was still a very poor kit.
Removing parts from the pour blocks was quite easy except for the carriage. This piece practically needs to be carved from its block and great care needs to be taken here. Once I had it
separated from the pour block I realized that the legs were pretty much unusable from the proliferation of pinholes, and after some thought I decided that a majority of
the kit parts were going to have to be replaced, and some missing detail needed to be added as well. I filled the various pinholes as best as I could and proceeded to build the kit in two
sub-assemblies: one for the carriage and one with the barrel and associated parts.
|
|
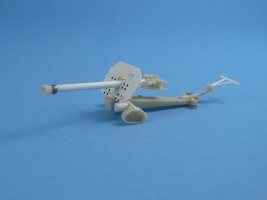
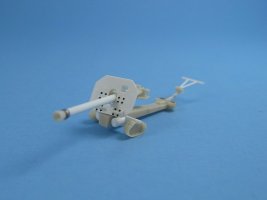
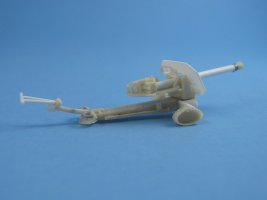
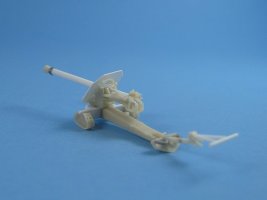
The above pictures show the kit before painting - kit parts are the cream coloured pieces,
while my scratch
built parts are in white plastic. I kept the kit's carriage, trunnions, flash suppressor, skids, the part containing the grips & breech, and the trailer arm & towing loop. Replaced were the barrel, shield (with
Archer rivets added), the legs/axle and its cylindrical projections, and the grab handle. The band used to hold the flash suppressor in place was redone with a strip of lead foil. The grey items on the
top of the spade are handles obtained from the spares box. The only major detail not added was the extension of the barrel inside the flash suppressor, as seen in this reference picture below.
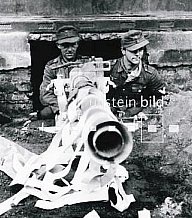 . .
The atrocious skis were discarded completely (see pictures below).
This was my one concession to laziness with this build as I was by this time not in the mood to try and salvage or replace them. Since I had seen some pictures of Püppchen resting on
their skids with no wheels or skis I figured this was a credible alternative.
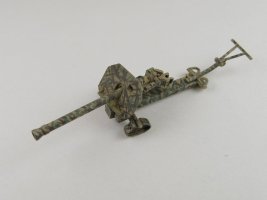
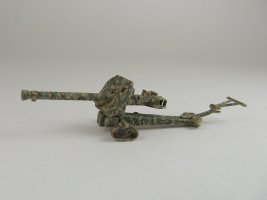
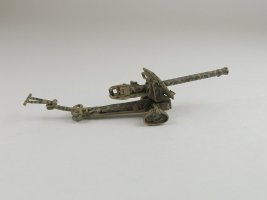
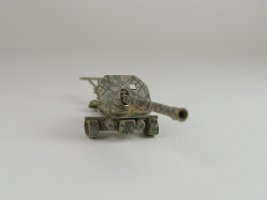
| Painting was an easy affair. An airbrushed primer coat of light grey enamel, followed with a pre-shade of dark brown enamel and then a Panzer yellow top
coat, some pin washes with black, and finally green and brown slashes applied using a small brush. A flat coat finished everything off. |
 |
|
Conclusion:
This is a very tiny kit which builds into a nice little representation of the Püppchen, but be prepared to put a lot of work into building it, especially when you consider that it comes with so few parts. It would have been a splendid little kit if the resin casting
had been anywhere near as nice as the detail of the parts. As it stands, I can only recommend this kit to the modelling crazies like myself.
Update: 11/February/2017 (Al Magnus)
I've always had my doubts as to the actual scale of the attack Püppchen. When placed next to some of the smaller guns in my collection, such as the
3.7cm Pak 35/36, there's not much difference in size, yet the Püppchen is a substantially smaller weapon, designed to be easily manhandled into place by a two man crew.
So when I built the S-Model kit it was markedly smaller in size compared to the Attack Püppchen. A few basic measuremnts of the two guns, and the conclusion
regarding their respective scales can be found in my S-Model review here.
References:
[1] Field Rocket Equipment of the German Army 1939-45, T.J. Gander, Almark Pub. Co., New Malden, Surrey 1972 ISBN: 85524 085 7
[2] Lonesentry.com
[3] Wikipedia
[4] militarymodels.co.nz (walk around)
[5] weapon.at.ua (Ukrainian site)
Review sample purchased by the author.
|
